


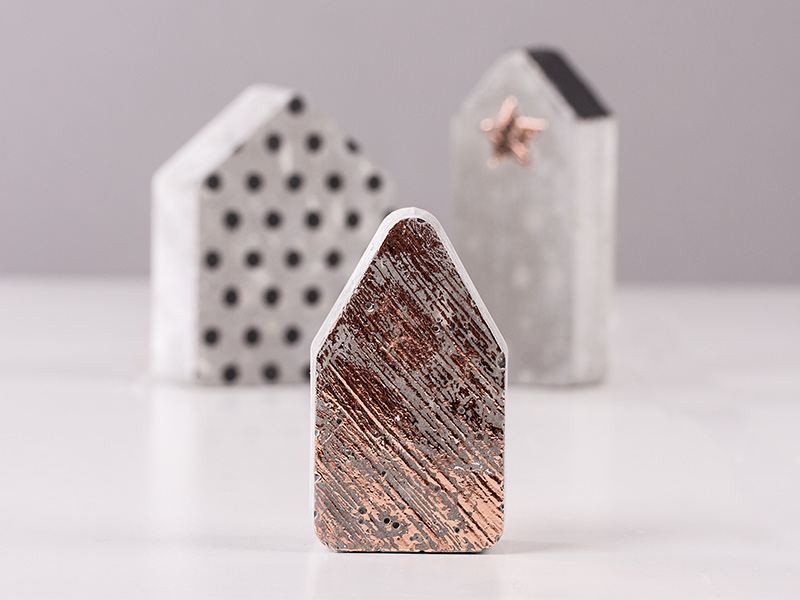


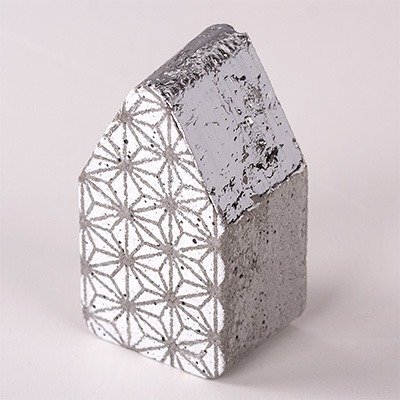
Instructions in 11 steps Mirror effect foil or Chalky Finish paint? Both look great on the plain concrete houses.
Small house:
100g of cement
Narrow house: 180g of cement
Large house:
300g of cement
The mixing ratio is 1 : 10 (1 part of water : 10 parts of cement).
Besides the articles listed below, you also need: Edible oil, sandpaper, craft wooden stick, brush, container for mixing of the cement, pad out of crepla or cardboard
And this is how it works: 1 ![]()

Step 1
For the preparation, place the mould on a stable surface so that it does not wobble and spread out its inner side with edible oil.2 ![]()
Step 2
For the houses you need:Small house:
100g of cement
Narrow house: 180g of cement
Large house:
300g of cement
The mixing ratio is 1 : 10 (1 part of water : 10 parts of cement).
3 ![]()
Step 3
Fill a plastic bucket/bowl with about 58ml of water and add gradually about 580g of the creative-cement powder. Stir this mixture with a wooden spatula until an uniform, pourable mass is reached.4 ![]()
Step 4
Pour the casting compound into the prepared mould (do not pour it quite to the upper edge). Allow the mixture to rest for 1-2 minutes. Thereby tap repeatedly and slightly onto the mould to release any air bubbles from the cement mass.5 ![]()
Step 5
Let it dry over the night.6 ![]()
Step 6
The very next day you can demould the object. Therefor, turn around the casting mould and lay it down on a pad as for example a sponge rubber or a cardboard. Work with a light pressure of the palm of your hand against the mould, thus air can not penetrate between casting object and mould. Keep tapping the mould gently on your pad, so that the cement object is completely detached from the mould.7 ![]()
Step 7
Let it harden. The curing time depends on the size and the temperature (best 1 up to several days).8 ![]()
Step 8
Small burrs and imperfections you can grind with a sandpaper.9 ![]()
Step 9
Let it dry at least 1 day.10 ![]()
Step 10
For a particular effect, you can additionally paint the cement-houses or decorate them with a stencilled motif. Therefor, put the desired template onto the casting object and apply carefully some Chalky Finish paint by using the sponge stamp. Then remove the template and let it dry.11 ![]()
Step 11
You can achieve also great effects with a glossy mirror-foil. Therefor, apply the glue for foil onto the desired spot by using a brush and let it dry to a clear film (it takes at least 1 hour). Then decorate it mirror-foil according to the package instructions.Related craft ideas Looking for similar craft ideas? You can find them here: ![]()
![Difficulty -]()
![]()
![Difficulty -]()
![]()
![Difficulty -]()
![]()
![Difficulty -]()
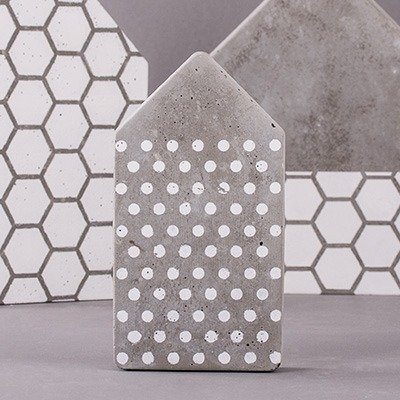
Cement-house with spots
DIFFICULTY

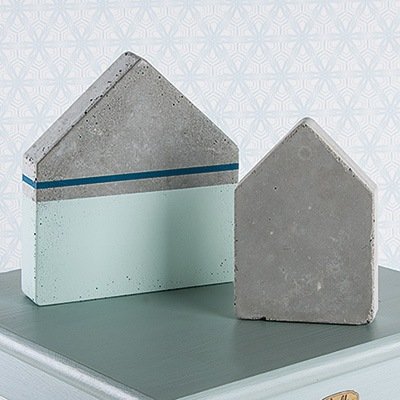
Cement-house with mint Chalky Finish paint
DIFFICULTY
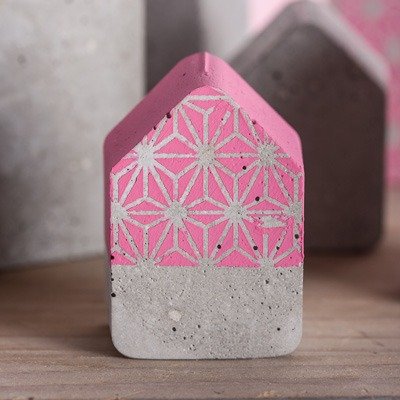
Small cement-house with pink Chalky Finish
DIFFICULTY

The stencilled cement-house
DIFFICULTY