


Instructions in 7 steps If you coat a plastic plant pot with kneading-cement, you have the basis for this special pot. The crown prongs are also made with kneading-cement.
Besides the articles listed below, you also need: Container for kneading of the cement (e.g. bowl with lid) Disposable gloves, stable support e.g. the lid of a, plastic bucket, plastic flowerpot ø 13 cm, brush, small container with water, poss. cutter
And this is how it works: 1 ![]()

Step 1
The flowerpot must be clean and free of grease. Always wear the gloves while working!2 ![]()
Step 2
Mix the kneading-cement with water in the ratio 9:1 (9 parts of cement : 1 part of water). This corresponds to about 180 ml. Stir the water slowly, gradually add it while constantly kneading. Knead the crumbly mixture with damp disposable gloves (if necessary, moisten several times) until the desired consistency is achieved.Tipp: Du kannst den Knetbeton auch schnell und einfach in einem dicht verschließbaren Behälter mischen. Hier auch das Wasser langsam, unter ständigem Rühren zufügen, Behälter schließen und diesen gut schütteln. So staubt es nicht so und die Teile vermisch
3 ![]()
Step 3
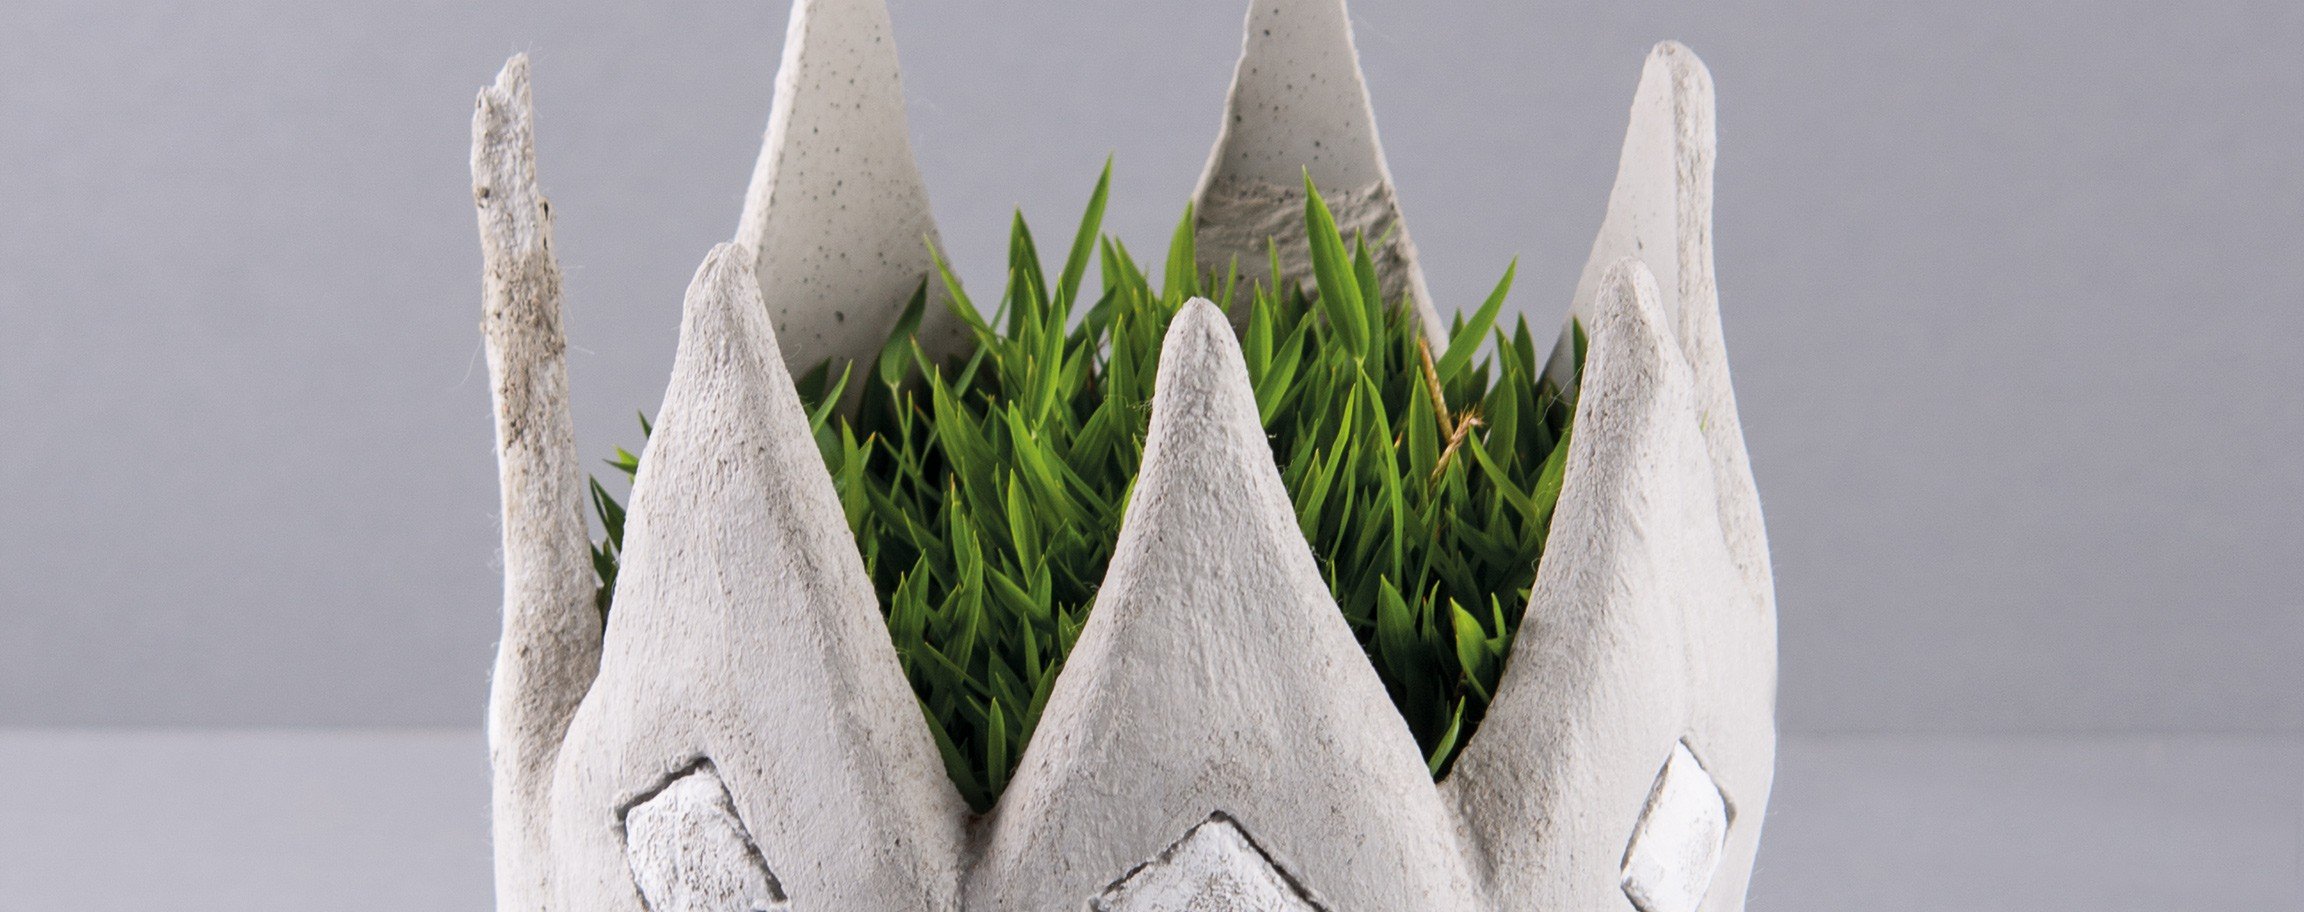
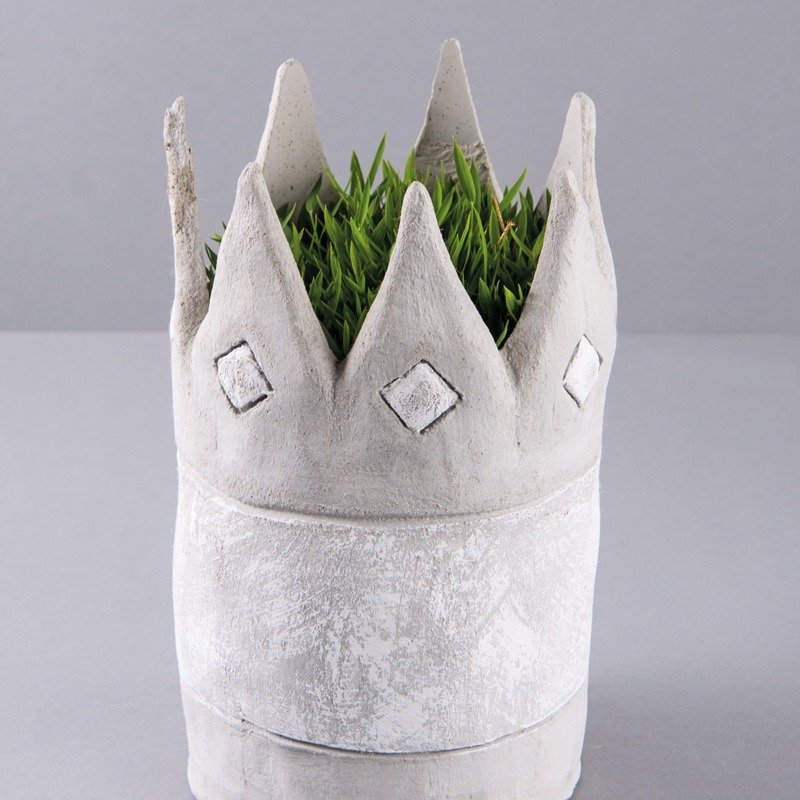
Put the kneading-cement onto the flowerpot by hands until it is coated all around. Potentially spread upwards the cement evenly with a slightly moistened brush.4 ![]()
Step 4
Sculpt out of the remaining cement 7 triangles that you put as a crown tines upwards around the coated pot (the connection joints should be always damp, potentially work it out with a lightly moistened brush). Stop-up the connection joints with your thumb. You can rework on the crown tines by shaping them a bit with a lightly moistened brush or decorate the pot via the modelling tool or cookie cutters with sophisticated patterns.5 ![]()
Step 5
Let it dry at least 1 day.6 ![]()
Step 6
You can achieve great effects by decorating the crown with a sponge stamp and the white Chalky Finish paint.7 ![]()
Step 7
The entire drying period lasts for several days. After about 21 days the object is weatherproof.Related craft ideas Looking for similar craft ideas? You can find them here: ![]()
![Difficulty -]()
![]()
![Difficulty -]()
![]()
![Difficulty -]()
![]()
![Difficulty -]()

Vase out of kneading-cement
DIFFICULTY


Pot with star-motif out of kneading-cement
DIFFICULTY


“Crown” – 11 cm out of the kneading-cement
DIFFICULTY
Cement ball ø 12 cm
DIFFICULTY