


Instructions in 10 steps Golden pricked foil for ambient lighting - Christmas is getting luminous.
Besides the articles listed below, you also need: strong paper, pencil, sellotape (Tesa), star template, light source
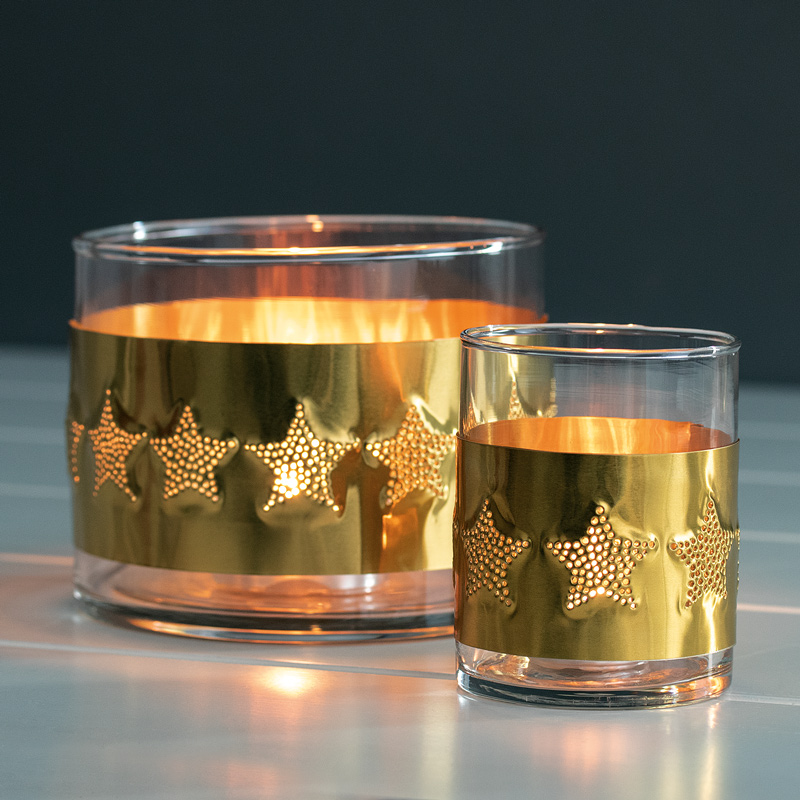
And this is how it works: 1 ![]()

Step 1
To be able to cut the following strips from the aluminium embossing foil with the craft scissors, trace a line with a pencil and aluminium ruler: For the small jar: 1 strip 6 × 27 cm. For the large jar: 2 strips 7 × 26 cm.2 ![]()

Step 2
7 stars have to be pierced on the strip for the small jar. For the large jar, stick the two strips together with an overlap of 1 cm using the double-sided adhesive tape. 14 stars have to be pierced here.3 ![]()
Step 3
Transfer the star template with the two stars onto strong paper and cut out the inside of the stars with the pointed tip paper scissors. The lower edge of the template is that way the lower edge of the aluminium embossing foil.4 ![]()
Step 4
For the large lantern, start piercing the first star in the middle of the aluminium embossing foil. On this strip, put the stars next to each other at a distance of 5 mm each.5 ![]()
Step 5
Lay the aluminium embossing foil on the felt piercing pad. Put the star template on top (flush with the lower edge of the aluminium embossing foil). Hold the template firmly. Now pierce the first two stars. Hold the paper awl vertically and pierce through the aluminium embossing foil. Start with the star outline and then pierce the star over its wide area.6 ![]()

Step 6
For the 3rd star, place the 1st star of the star template on the 2nd pierced star and pierce it as described.7 ![]()
Tip
When the paper awl is piercing deeper into the aluminium embossing foil, larger holes will result and thus the motif will produce more luminous effects!8 ![]()
Step 7
To smooth the back of the aluminium embossing foil and give it a more even surface, put the front of the foil on a soft, firm surface and smooth it with the acrylic roller evenly along the length of the back while applying a gentle pressure.9 ![]()
Step 8
For the aluminium embossing foil strip of the small lantern, start with the star border after 2 cm. The stars have to be put next to each other at a distance of 5 mm each.10 ![]()