


Instructions in 6 steps White Chalky Finish paint is the basis for making the wooden candle arch. Glue textured snow and little wooden decorative shapes to scatter onto the central area.
Besides the articles listed below, you also need: AA batteries for rotation mechanism 2 pieces, AA batteries for string lights 3 pieces
And this is how it works: 1 ![]()

Step 1
Paint the wooden candle arch with the painting sponge and the white Chalky Finish paint and let it dry out.2 ![]()
Step 2
Trace the star on the wooden candle arch by means of the Quickie-Glue adhesive stick and sprinkle immediately the glitter dust onto it. Allow to dry out.3 ![]()
Step 3
Apply the modelling snow to the wooden deco-shape Tree and let it dry out.4 ![]()
Step 4
Assemble the 3D wooden construction kit according to the instructions and affix it with the Klebefix-Pen.5 ![]()
Step 5
Attach the string lights and the rotation mechanism. Insert the batteries.6 ![]()
Step 6
Place the decorative fir trees and deer, and affix them firmly with the Klebefix-Pen.Related craft ideas Looking for similar craft ideas? You can find them here: ![]()
![Difficulty -]()
![]()
![Difficulty -]()
![]()
![Difficulty -]()
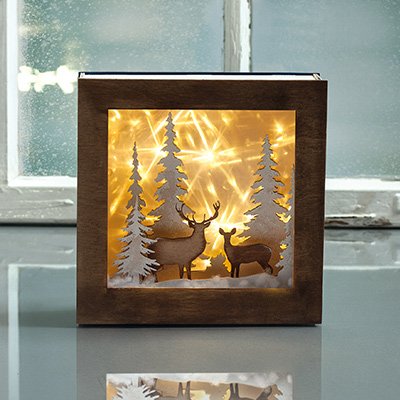
Your story-in a box: Deer & roe deer
DIFFICULTY

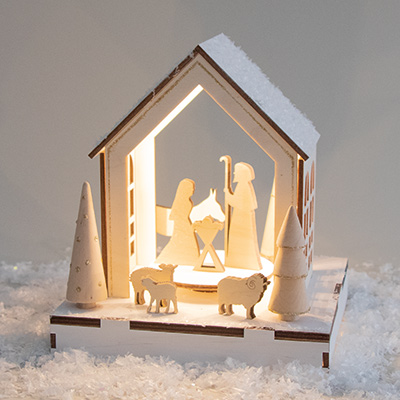
Wooden decoration object House with Crib
DIFFICULTY
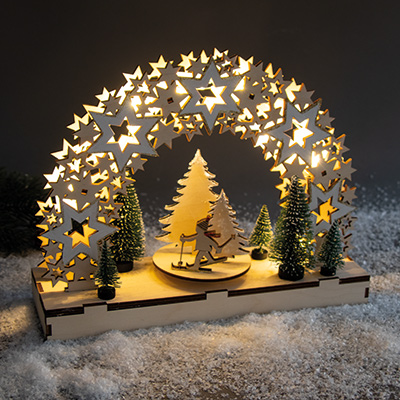
Wooden candle arch Star with Skier
DIFFICULTY