


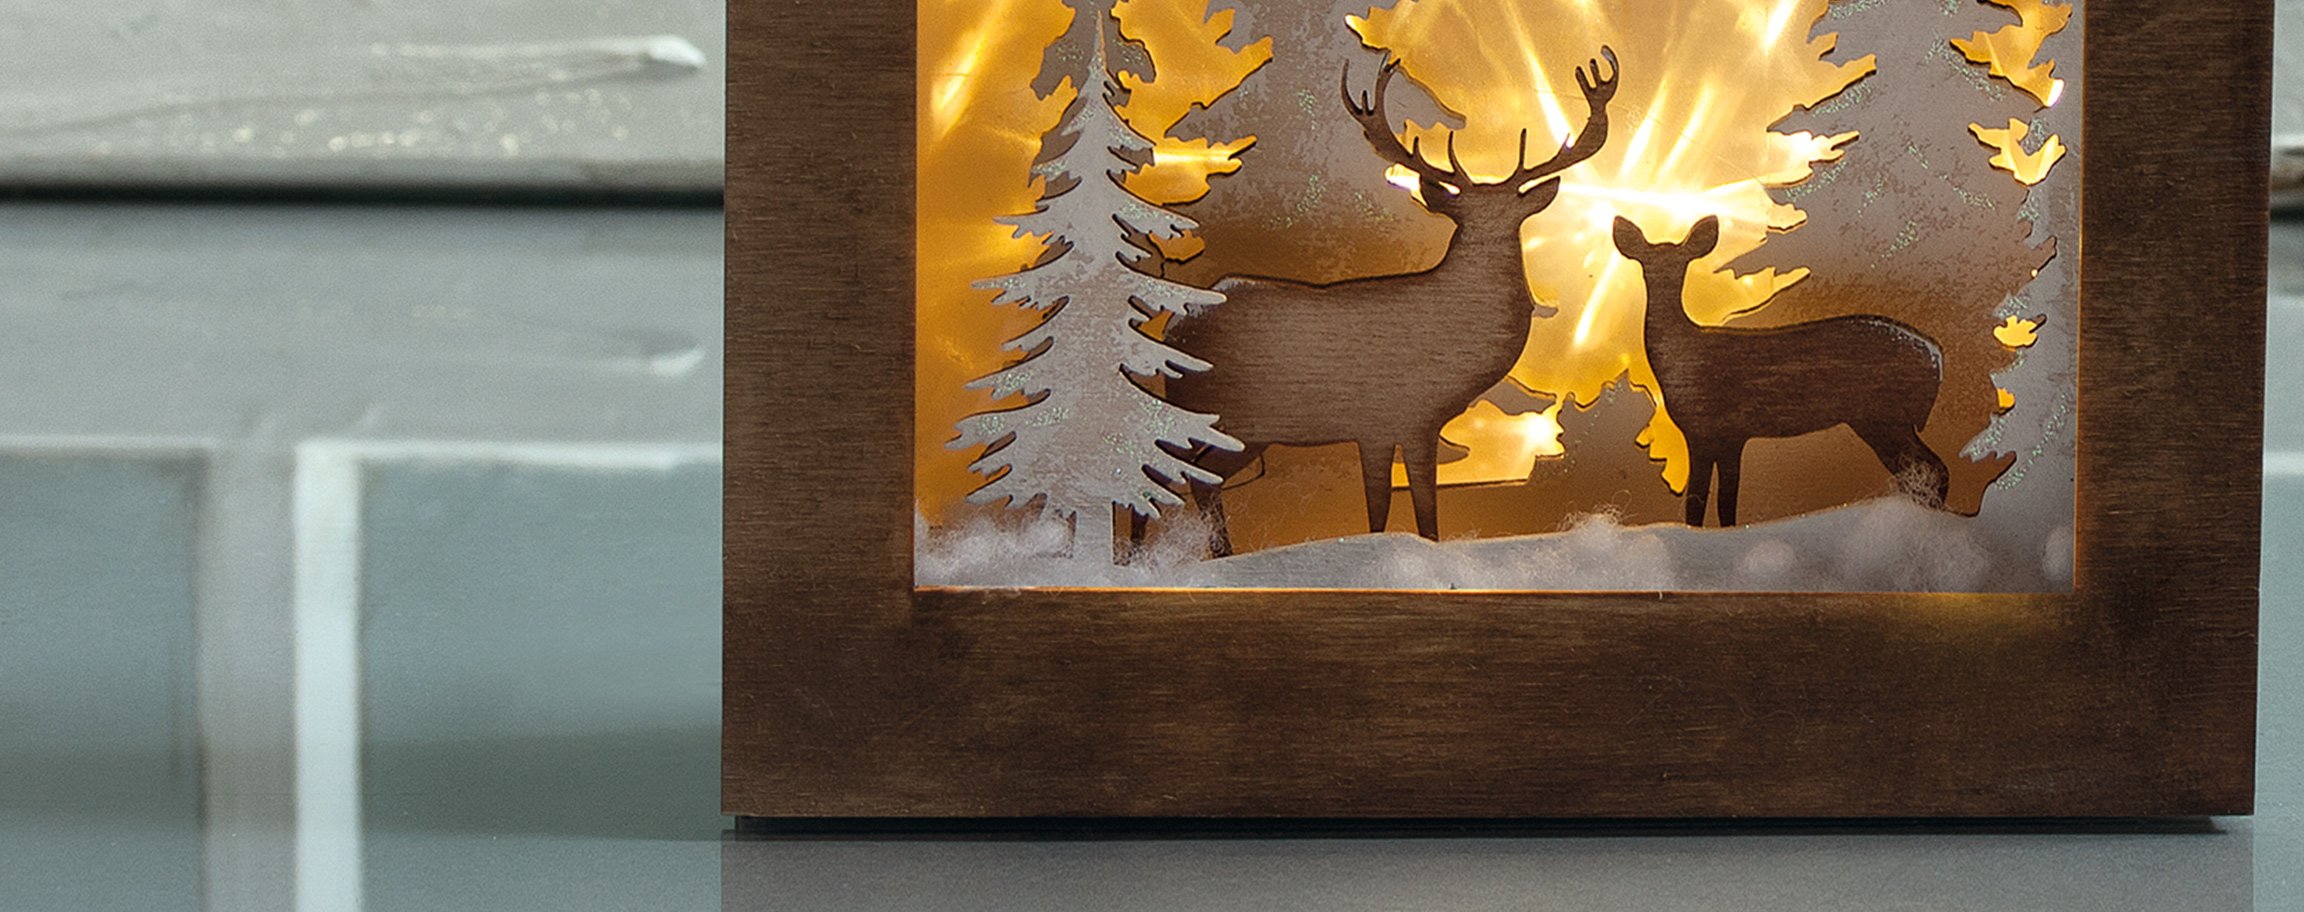
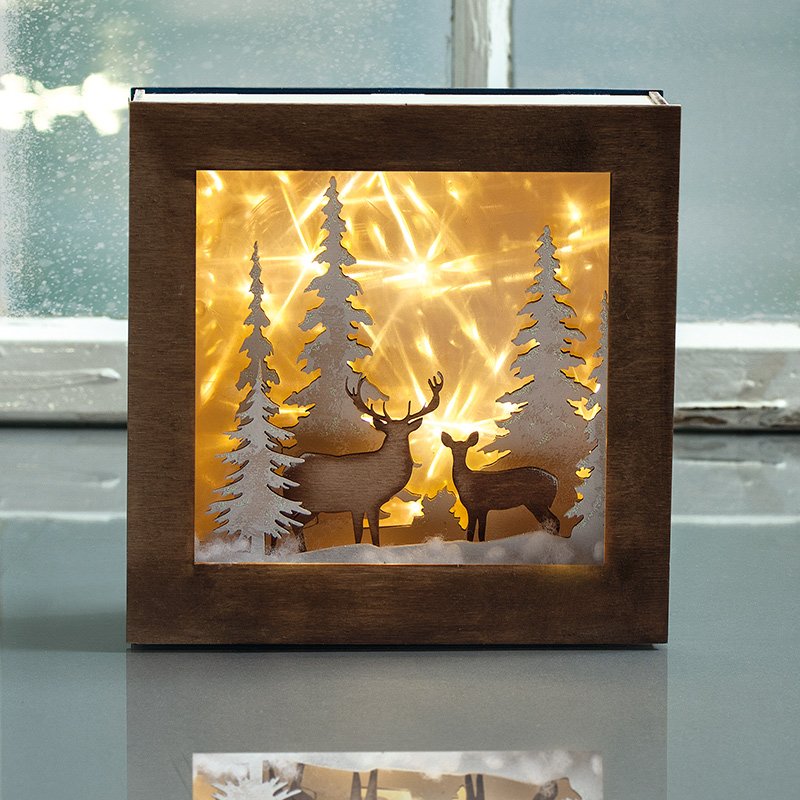


Instructions in 12 steps The LED background lighting makes the forest scenery look divine.
Besides the articles listed below, you also need: Tinfoil, paper towel (Zewa), batteries
And this is how it works: 1 ![]()

Step 1
For the inner frame, put the wooden slats upright together, so that it fits later into the upper part of the box. Apply some glue for wood to the respective connection points. Let it all dry well out.2 ![]()
Step 2
For the viewing frame of the box and the forest animals – deer & roe deer, moisten the painting sponge shortly with water and smear slightly the paint over the visible surfaces with some All Purpose paint in chestnut colour. Afterwards, wash the painting sponge well out.3 ![]()
Step 3
Paint the side panels, the rear wall and the fir trees with the white Chalky Finish paint. Put some Glitter Glue onto the trees and let it dry well out.4 ![]()
Step 4
For the application of the 3D effect-foil, you need the wooden frames that are stuck together and dried out. Affix the double-sided adhesive tape (6 mm) onto the frame and pull the red protective foil off.5 ![]()
Step 5
Lay the 3D effect-foil smoothly, put the frame onto it and press it slightly down. Cut off the exceeding foil at the outer edge with a cutter.6 ![]()
Step 6
Then, you will need the rear wall, all side panels and the double bottom of the box.7 ![]()
Step 7
Dispose the lights of the fairy lights at the rear panel by means of the double-sided adhesive tape, but just enough to cover the first bottom. Please note before sticking: the battery compartment should be placed downward between the two bottoms. The battery box with the switch for the fairy lights has to be mounted directly behind the opening.8 ![]()
Step 8
Attach the bottom and the side panels to the rear wall.9 ![]()
Step 9
Now, insert the frame with the glued 3D effect-foil into the assembled together 3D motif-frames.10 ![]()
Step 10
Then take the elements with trees, deer & roe deer and small trees, and insert them into the double bottom.11 ![]()
Step 11
Apply one strip of the double-sided tape to the front element with the trees. Pull off the protective foil and glue some fluffy decorative flakes.12 ![]()
Step 12
At the end, affix the double-sided adhesive tape (9 mm) onto the surface of the box. Then remove the protective foil and press the painted viewing frame onto the box with the wider side facing down.Related craft ideas Looking for similar craft ideas? You can find them here: ![]()
![Difficulty -]()
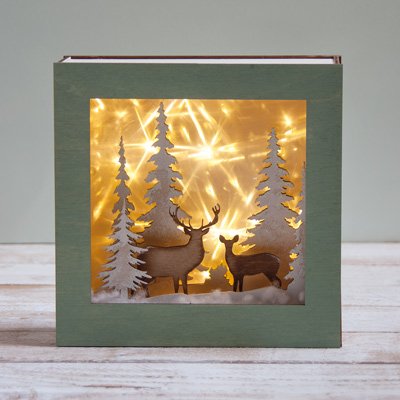
Your story-in a Box: Deer & Forest
DIFFICULTY
