


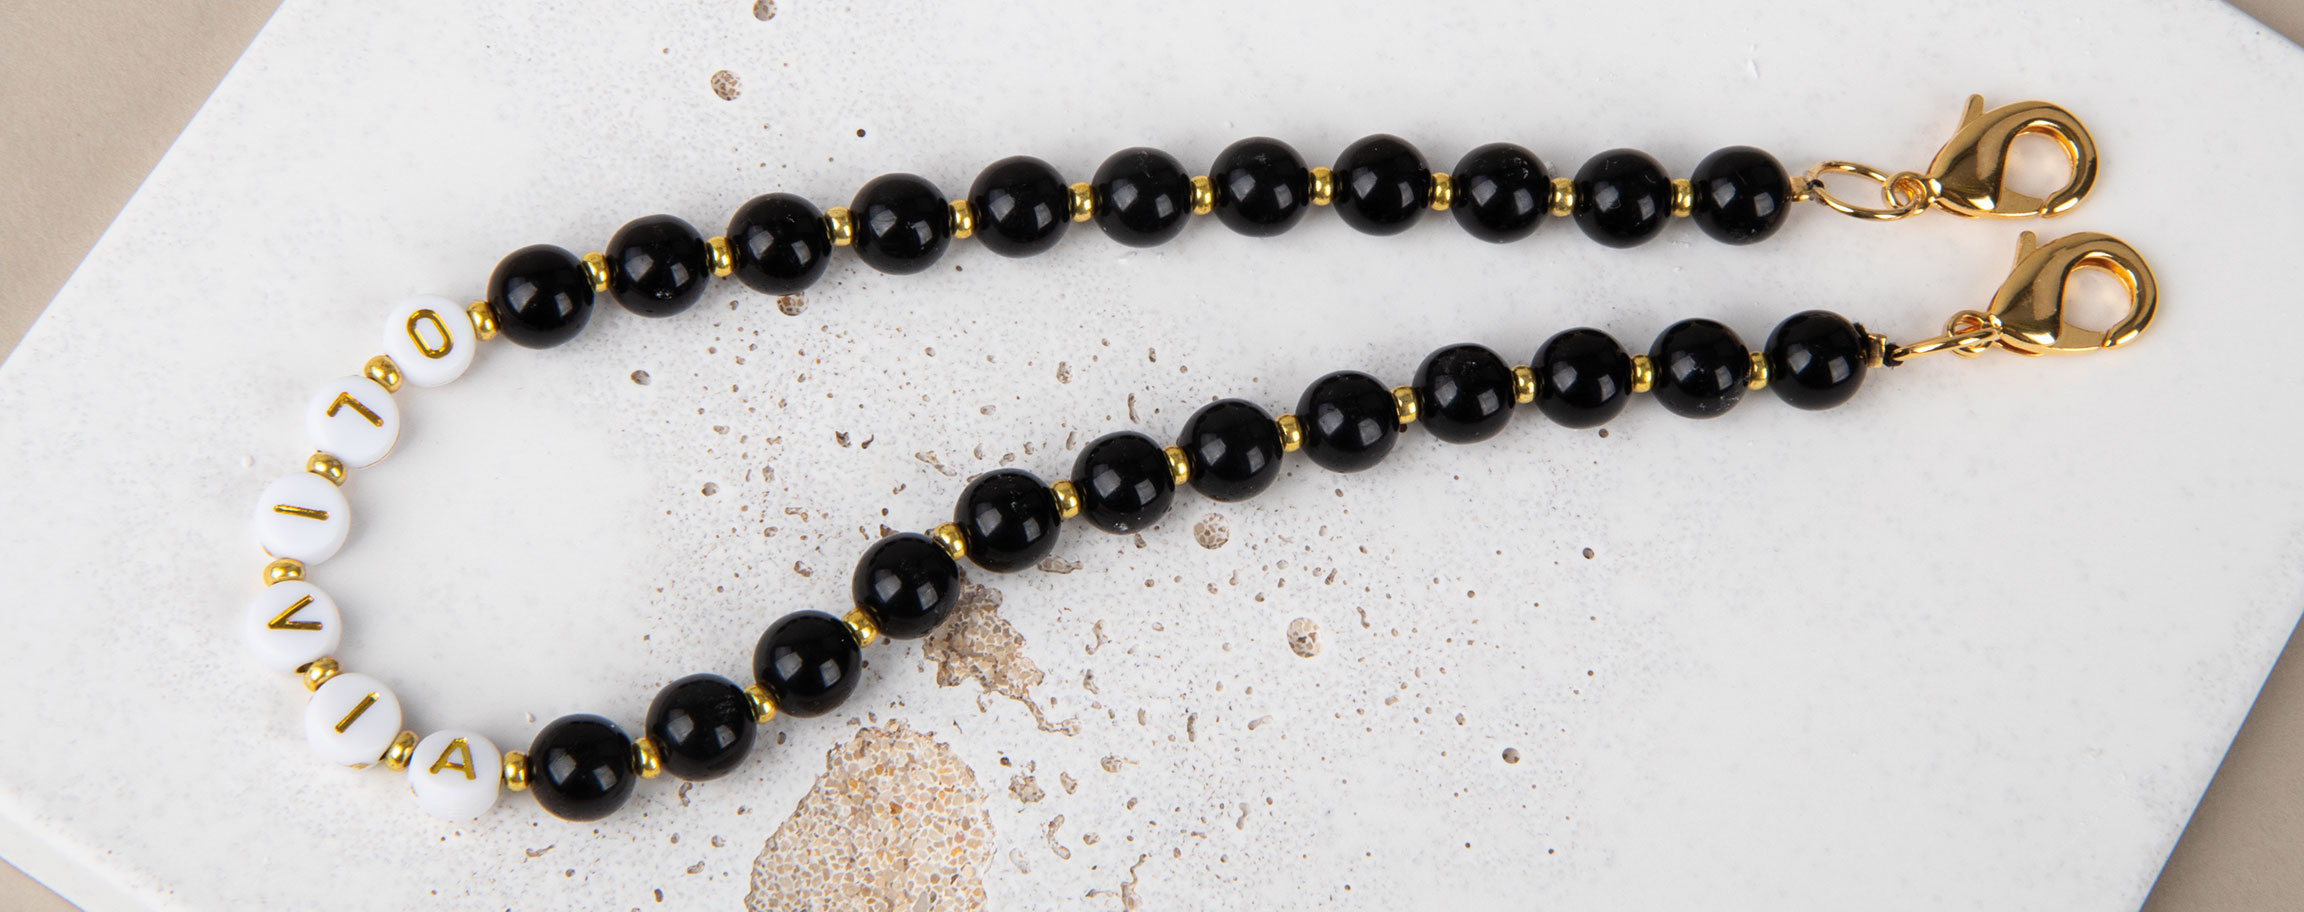


Instructions in 8 steps It's all yours. Customised mobile phone chain.
Besides the articles listed below, you also need: Scissors, toothpick
And this is how it works: 1 ![]()

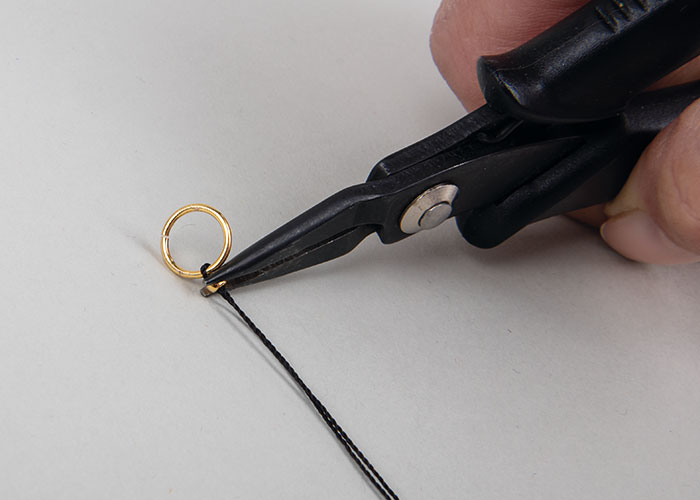
Step 1
Insert the threading silk into the jump ring and straighten it in the middle of the jump ring. Insert both ends of the threading silk into the special bead threading needle and thread a crimp cover on.2 ![]()
Step 2
First, secure this crimp cover in place underneath the jump ring with a bit of glue for jewellery (it's best to apply the glue with a toothpick), then press it down using snipe-nose pliers for jewellery3 ![]()

Step 3
The different beads and letters can then be strung to the desired length.Tip: To ensure that the name is placed in the middle and that the chain fits loosely around the wrist, it is advisable to lay the different beads on a level surface to determine the precise number of beads to be strung.
4 ![]()

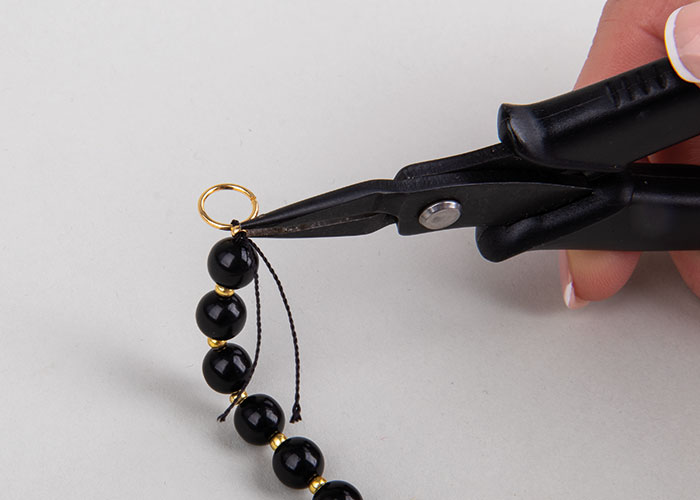
Step 4
To set the clasp, thread the other crimp cover. Then pass the needle through the second jump ring and back through the crimp cover.5 ![]()
Step 5
Secure also this crimp cover in place with a bit of glue for jewellery and press it down using snipe-nose pliers for jewellery6 ![]()

Step 6
Feed the threading silk back through 2 or 3 beads (sew), then cut off.7 ![]()

Step 7
Last, but not least, slightly bend open the two jump rings using snipe-nose pliers and flat round pliers for jewellery, then attach a lobster clasp to each jump ring and finally close up each ring.8 ![]()

Step 8
Place the hang-on patch between the mobile phone and the mobile phone case.Related craft ideas Looking for similar craft ideas? You can find them here: ![]()
![Difficulty -]()

Gold mobile phone chain
DIFFICULTY
