


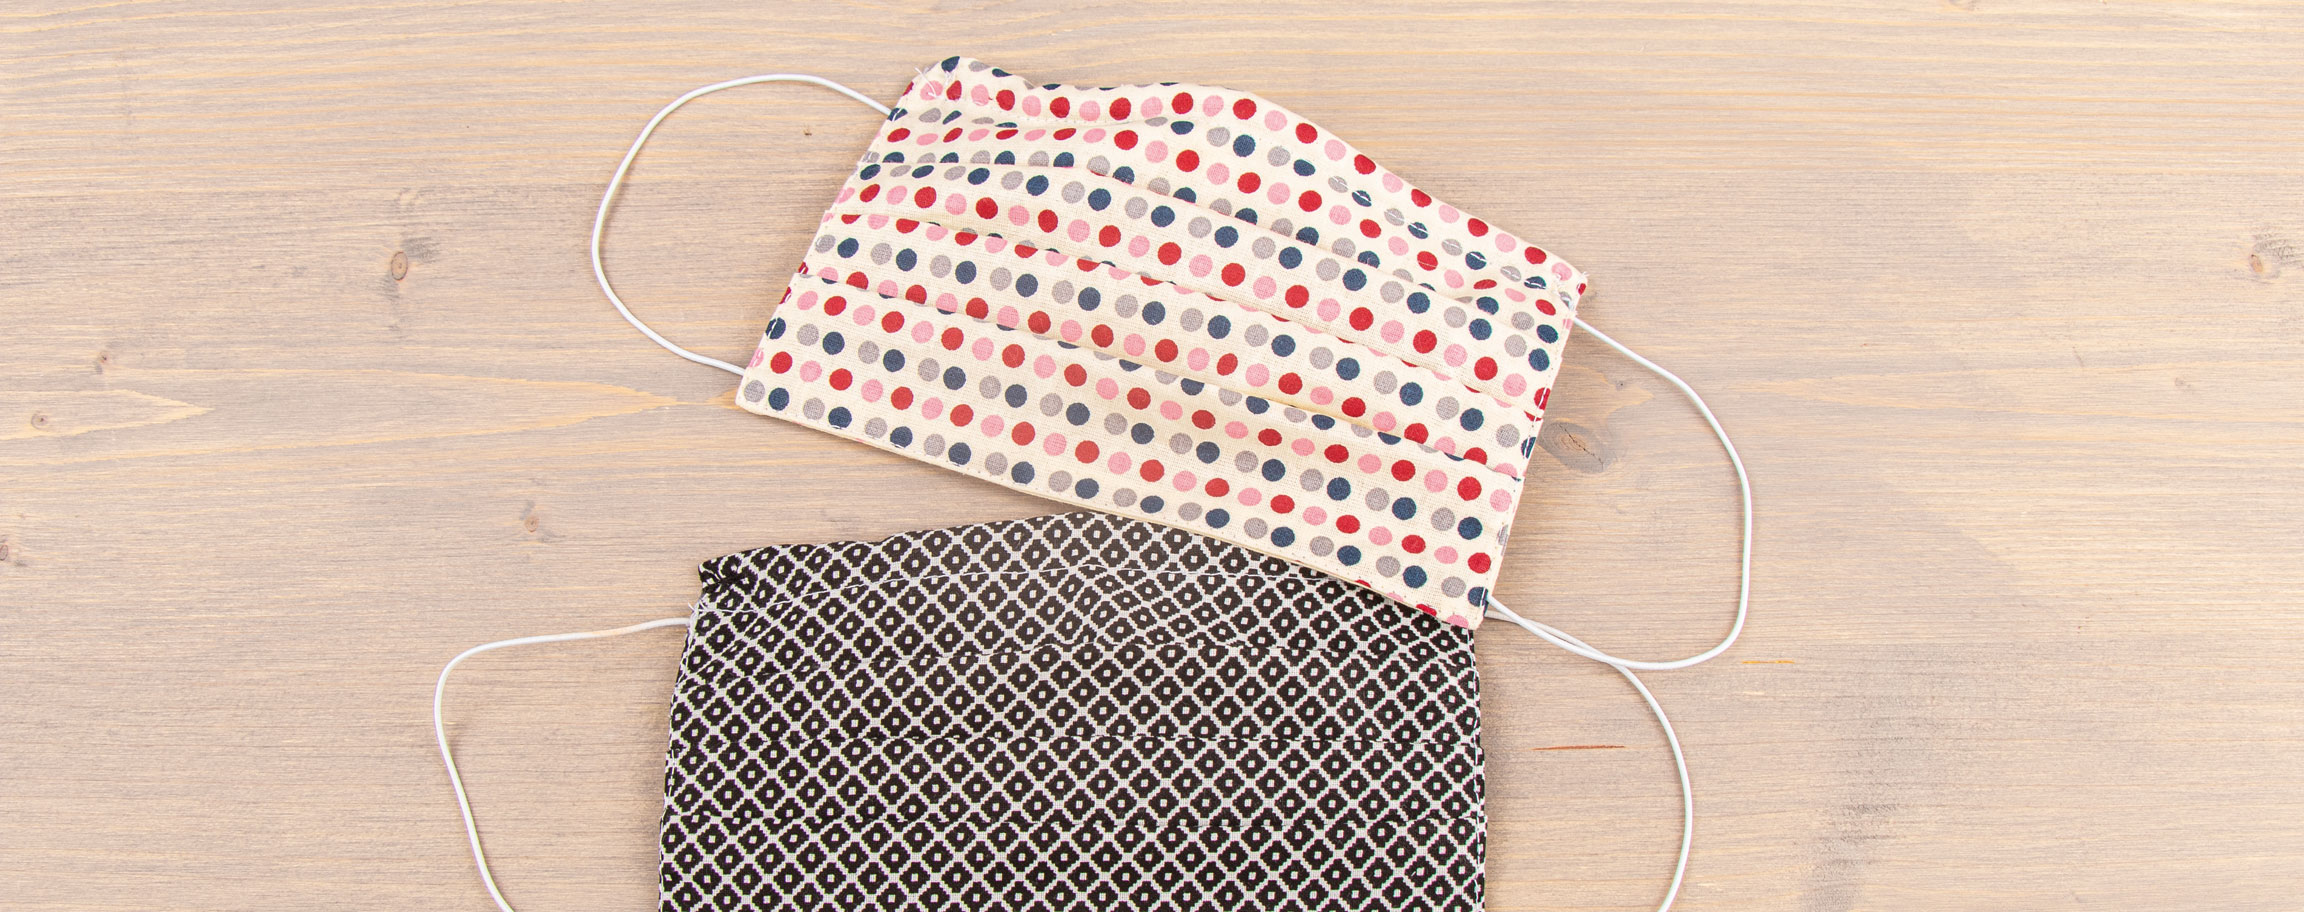


Instructions in 17 steps Act responsibly - protect yourself and others.
Besides the articles listed below, you also need: Sewing machine, sewing thread, iron, sewing needle
And this is how it works: 1 ![]()

Step 1
Wash and iron the fabric.2 ![]()
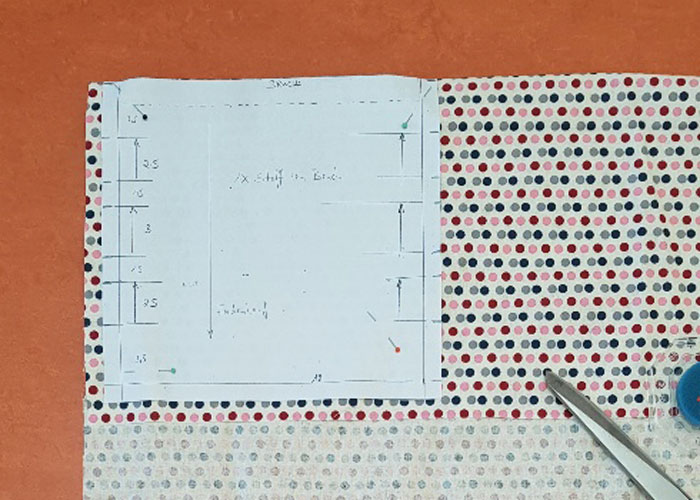
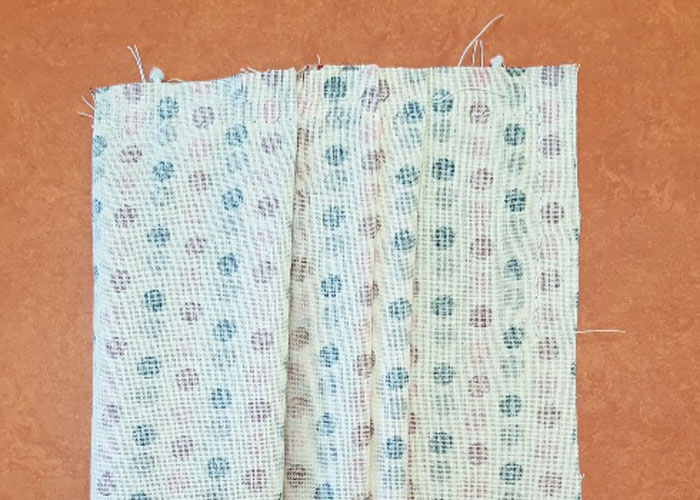
Step 2
Place the cutting at the folding edge of the fabric and cut by pinching (folding incisions 4 mm deep). Also mark the fold with a pinch on the right and the left side (cut it 4 mm deep).3 ![]()

Step 3
Tighten the pleats from bottom to top, in opposite to the front and rear side at both edges.4 ![]()
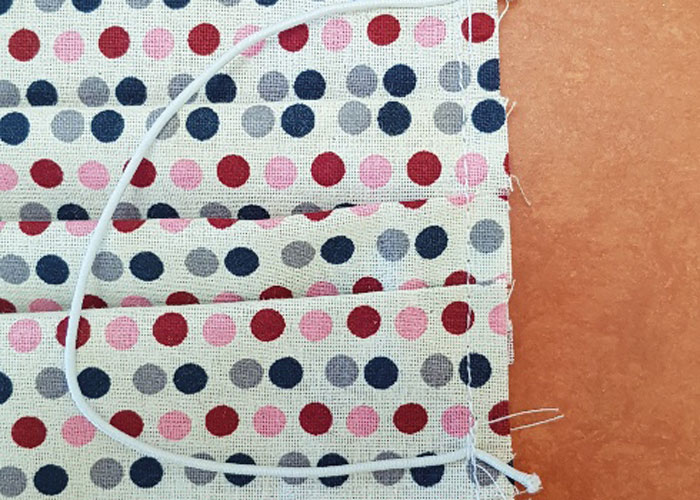
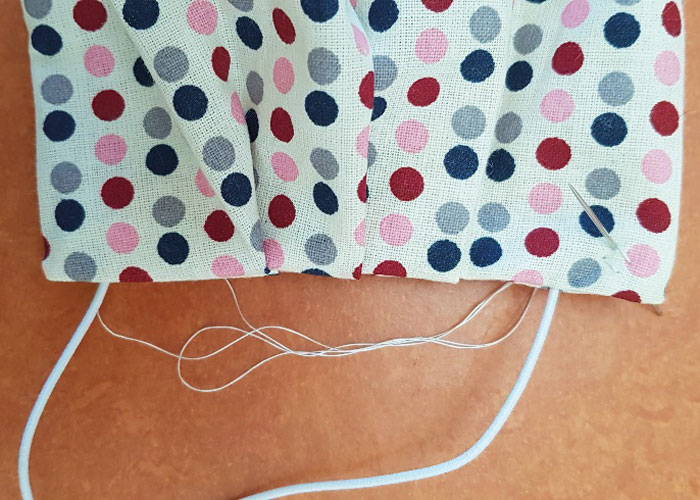
Step 4
Cut the elastic thread twice to the size of 20 cm. 1.5 cm is the seam allowance, this makes it easier to sew on. Sew one end of the elastic thread at 2 cm from the bottom edge. Sew the other end at 2 cm below the folding line. Sew the elastic thread in the same way at the other edge.5 ![]()
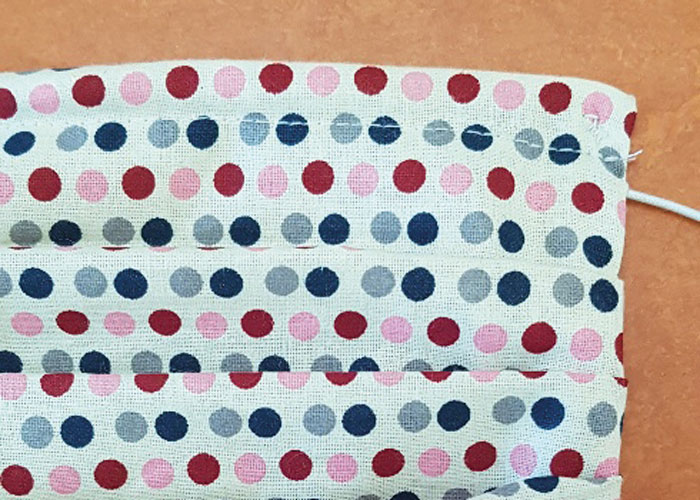
Step 5
Sew presser foot wide over the defined folds.6 ![]()
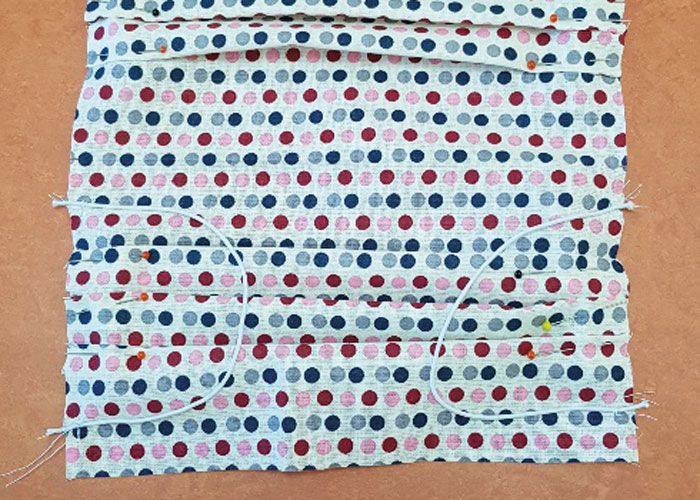
Step 6
Place the auxiliary mask right sides together. Sew the side seams together with a seam allowance of 1 cm at the edges, taking into account an approx. 10 cm long opening for turning in the middle at the bottom. As a precaution, stitch several times over the area of the sewn-in elastic thread.7 ![]()
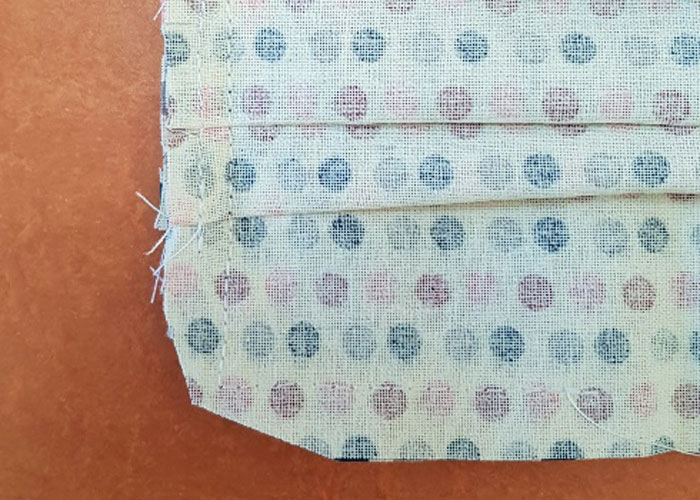
Step 7
Cut back the seams at the corners.8 ![]()
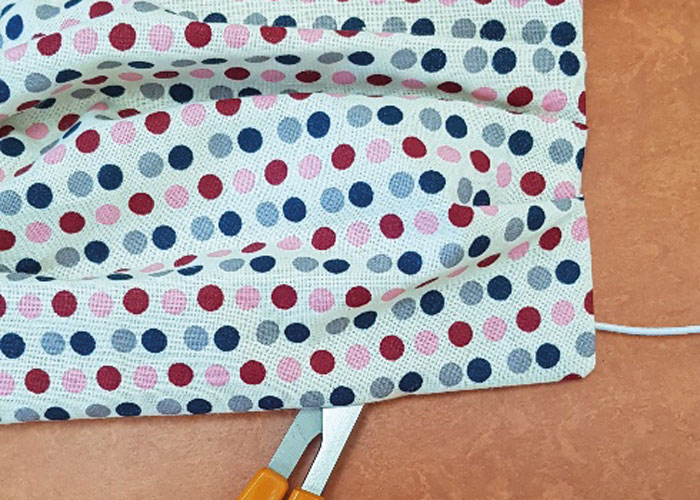
Step 8
Turn over the auxiliary mask. Turn the corners outwards by means of scissors/pin.9 ![]()
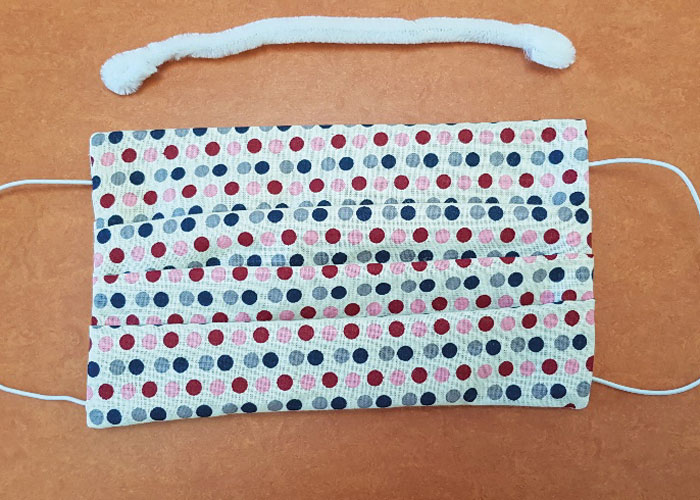
Step 9
Cut the chenille wire to the size of 21 cm. Bend the ends at about 1.5 cm.10 ![]()
Step 10
Insert the chenille wire through the opening for turning until it reaches the top of the fabric folding edge. Fix the folded chenille wire ends with stitches by hand.11 ![]()
Step 11
Top stitch the folding edge of the fabric at approx. 1.3 cm from the top to prevent the wire from slipping through.12 ![]()
Step 12
Stitch the auxiliary mask with narrow edges all the way around and sew the opening closed.13 ![]()
Step 13
Finally, iron the mask.14 ![]()
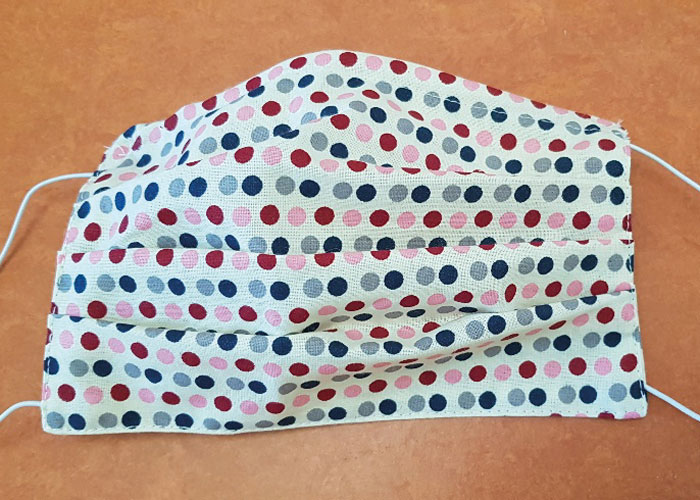
Tip:
The cutting can also be adjusted and widened. The finished dimension of 18 cm is based on a standard auxiliary mask.15 ![]()
Note:
This craft idea is for the production of one auxiliary nose & mouth mask. There is no certification or test of effectiveness. The manufacture and use of the mask is therefore at your own risk.16 ![]()
Maintenance and Cleaning:
· Always store dry · Remove the mask carefully · Avoid touching fabric area if possible · Mask washing: once a day at 60°17 ![]()