


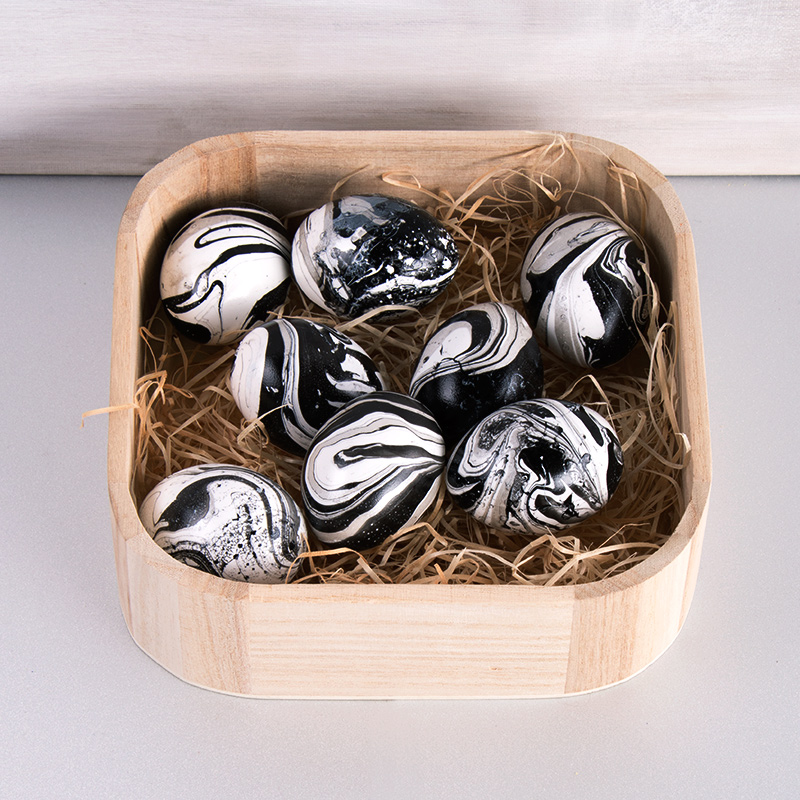


Instructions in 6 steps Marbled eggs are indispensable part of the traditional Easter decoration. Our black & white decorative eggs look particularly elegant and classy.
Besides the articles listed below, you also need: Dye vessel, Water, Copy paper
And this is how it works: 1 ![]()

Step 1
Fill a container, e.g. plastic bucket, with cold water. The egg to be marbled must be completely immersed. Skewer the plastic egg and shake the paint well out (approx. 30 sec).2 ![]()
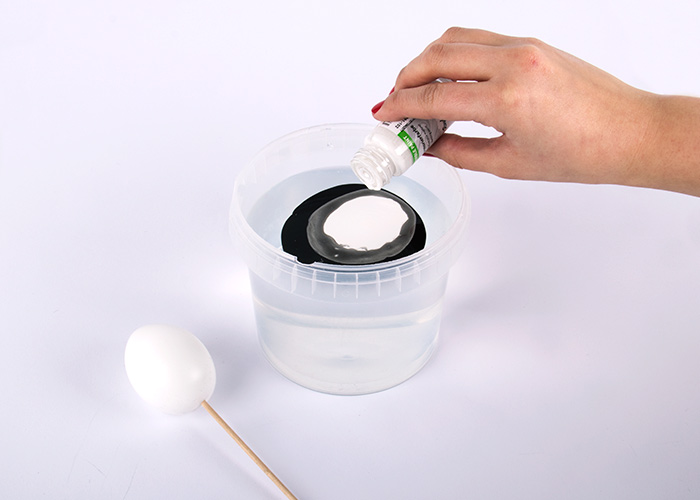
Step 2
Always drip the paint close to the water surface.3 ![]()
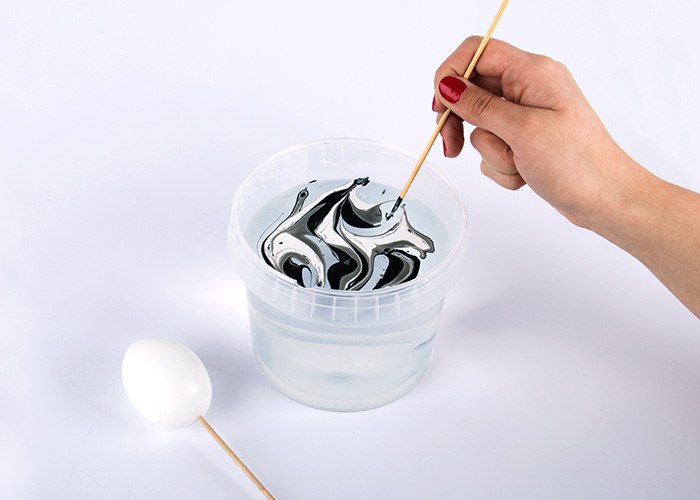
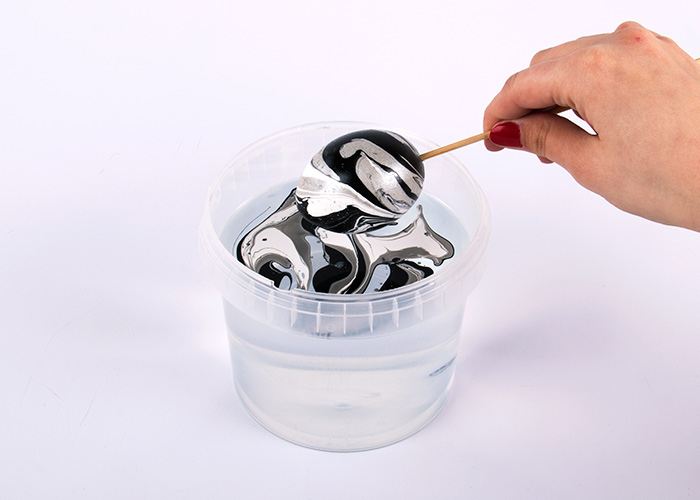
Step 3
Once the paint has dripped into the water, use immediately a wooden skewer to draw the marbling pattern.4 ![]()
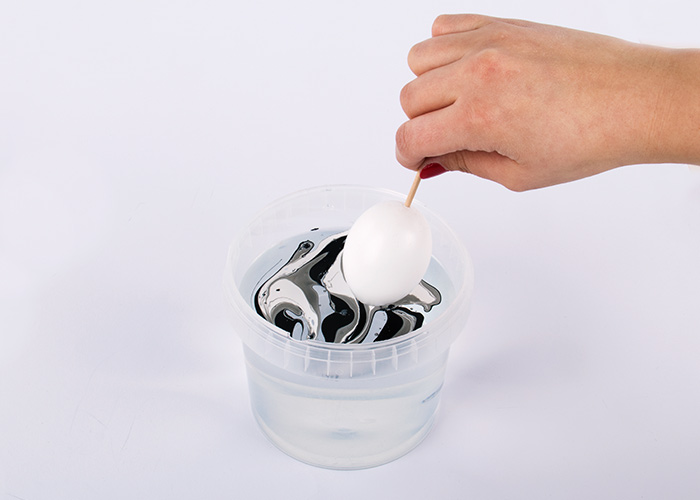
Step 4
Dip the egg slowly into the water by a circular motion, leave it there for a while and then quickly pull it out.5 ![]()
Step 5
Before taking it out blow briefly the water surface, so the paint will flow along the edge. Let the eggs dry vertically on a skewer. After 15 to 30 minutes, the paint is dust-dry.6 ![]()
Step 6
The paint residues remaining on the water surface can be quickly removed with a sheet of paper (with the edge of the paper). For the next marbling, the water must be clean of residues. In case of heavy soiling, use fresh, clean water.Related craft ideas Looking for similar craft ideas? You can find them here: ![]()
![Difficulty -]()
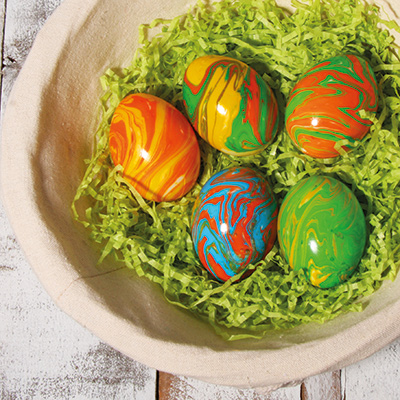
Marbled eggs
DIFFICULTY
