


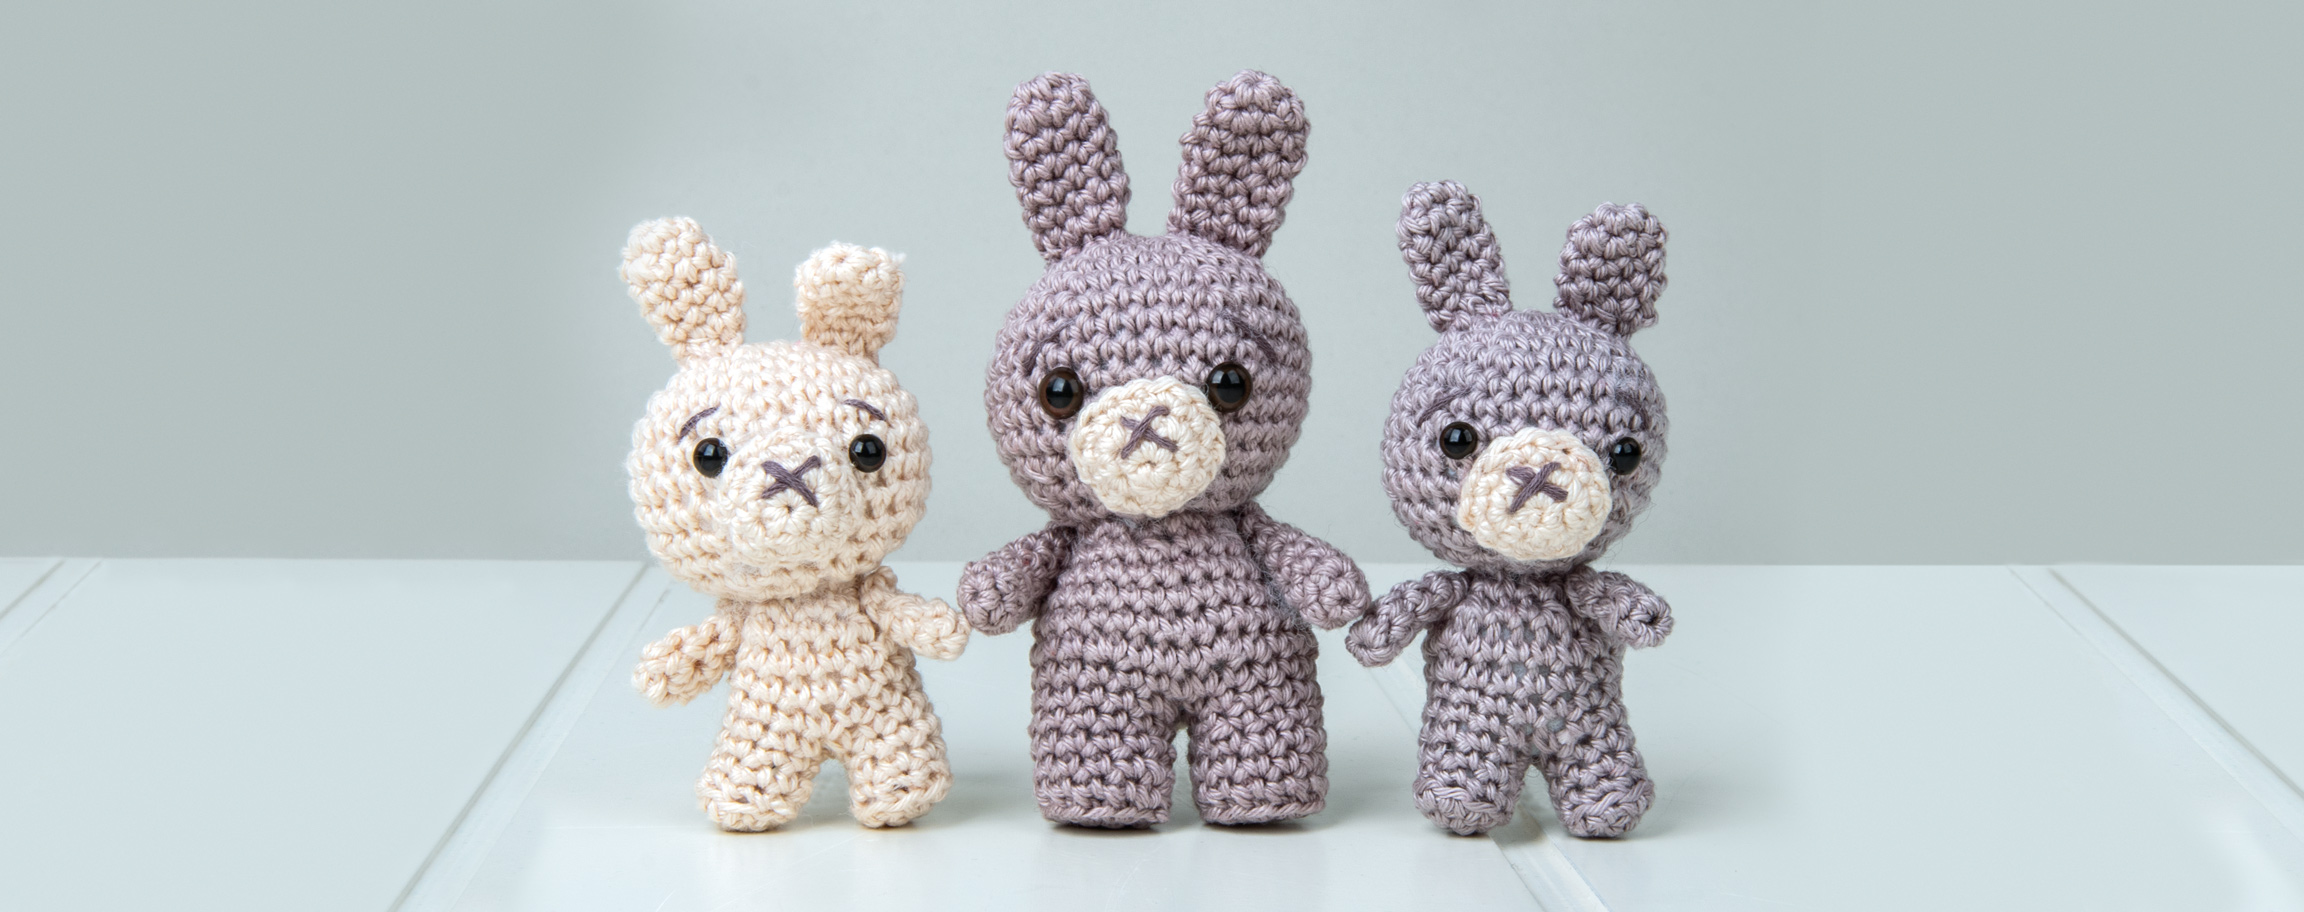


Instructions in 9 steps Crochet bunnies suitable for cuddling. Stitch-by-stitch, cute stuffed animals are created.
Besides the articles listed below, you also need: Cotton crochet yarn taupe and cream, lead tape, solid cardboard, pencil, scissors
And this is how it works: 1 ![]()

Abbreviations
C= colour; rd.= round; st= stitch; ch= chain stitch; dc= double crochet; ss= slip stitch; dc2tog= double, i.e. insert hook in next st, yrh and draw a loop through; BL= back loop; tr2tog= i.e. (yrh, insert hook in next st, yrh and pull up loop, yrh and draw through 2 loops) twice, yrh and draw through all loops on hook; ss bind-off= slip stitch bind-off, i. e. pull the yarn through the stitch with the needle to finish the work.2 ![]()
Instructions
Small bunny3 ![]()
Body
Start with the feet (crochet twice) 1. rd. with C taupe or cream, join 6 dc in the thread ring, close with ss to form a ring. 2. rd. 1 ch, the 3rd and 6th dc dc2tog (8 st), 1 ss 3. rd. 1 ch, crochet 8 dc insert hook only in BL (8 st), 1 ss 4. + 5. rd. 1 ch, crochet 8 dc (8 st), 1 ss Cut a piece of solid cardboard in the shape of the feet and insert it. To do this, place the rabbit's foot on the cardboard, trace the outline with a pencil and cut it out slightly smaller. 6. rd. 1 ch, crochet 16 dc over both legs together (16 st) (if necessary, sew the small loophole between the legs together with a few stitches), 1 ss 7. rd. 1 ch, crochet 16 dc (16 st), 1 ss 8. rd. 1 ch, the 3rd and 5th st as well as the 11th and 13th st dc2tog (20 st), 1 ss 9. rd. 1 ch, the 5th and 7th st as well as the 14th and 17th st dc2tog (24 st), 1 ss 10. rd. 1 ch, each 3rd and 4th dc tr2tog (18 st), 1 ss Put some lead tape on both feet so that the rabbit stands securely. Stuff the body with wadding. 11. rd. 1 ch, each 2nd and 3rd dc tr2tog (12 st), 1 ss 12. rd. 1 ch, each 2nd and 3rd dc tr2tog (8 st), ss bind-off, cut the thread long and let it hang.4 ![]()
Tail
1. rd. with C cream join 5 dc in the thread ring, close with ss to form a ring. 2. rd. 1 ch, the 2nd and 5th st dc2tog (7 st), 1 ss 3. rd. 1 ch, the 2nd and 3rd st as well as the 6th and 7th st tr2tog (5 st), ss bind-off, cut the thread long and let it hang.5 ![]()
Head
1. rd. with C taupe or cream, join 6 dc in the thread ring, close with ss to form a ring. 2. rd. 1 ch, each dc dc2tog (12 st), 1 ss 3. rd. 1 ch, each 2nd dc dc2tog (18 st), 1 ss 4. rd. 1 ch, each 3rd dc dc2tog (24 st), 1 ss 5. rd. 1 ch, each 4th dc dc2tog (30 st), 1 ss 6. to 9. rd. 1 ch, crochet 30 dc (30 st), 1 ss 10. rd. 1 ch, each 5th and 6th dc tr2tog (25 st), 1 ss 11. rd. 1 ch, each 4th and 5th dc tr2tog (20 st), 1 ss 12. rd. 1 ch, each 3rd and 4th dc tr2tog (15 st), 1 ss 13. rd. 1 ch, each 2nd and 3rd dc tr2tog (10 st), ss bind-off, cut the thread long and let it hang. Push the safety eyes through the stitches in the head and fasten them inside with the counterpart. Stuff the head with wadding and pull the remaining stitches together with a wool needle. Embroider two lines diagonally above the eyes with the cotton yarn Stitch&Knot.6 ![]()
Mouth
1. rd. with C cream, join 6 dc in the thread ring, close with ss to form a ring. 2. rd. 1 ch, each dc dc2tog (12 st), ss bind-off, cut the thread long and let it hang. Embroider a cross as a nose with the cotton yarn Stitch&Knot.7 ![]()
Ears (crochet twice)
1. rd. with C taupe or cream, join 5 dc in the thread ring, close with ss to form a ring. 2. rd. 1 ch, the 2nd and 5th st dc2tog (7 st), 1 ss 3. to 5. rd. 1 ch, crochet 7 dc (7 st), 1 ss 6. rd. 1 ch, the 2nd and 3rd st as well as the 6th and 7th st tr2tog (5 st), ss bind-off, cut the thread long and let it hang.8 ![]()
Arms (crochet twice)
1. rd. with C taupe or cream, join 5 dc in the thread ring, close with ss to form a ring. 2. to 4. rd. 1 ch, crochet 5 dc (5 st), 1 ss 5. rd. 1 ch, the 2nd and 3rd st as well as the 4th and 5th st tr2tog (3 st), ss bind-off, cut the thread long and let it hang.9 ![]()